Prages
User Error
This one isn't as detailed as the head cab was. The process is VERY similar though, so you can read through the head cab thread first and come back to this one for everything else.
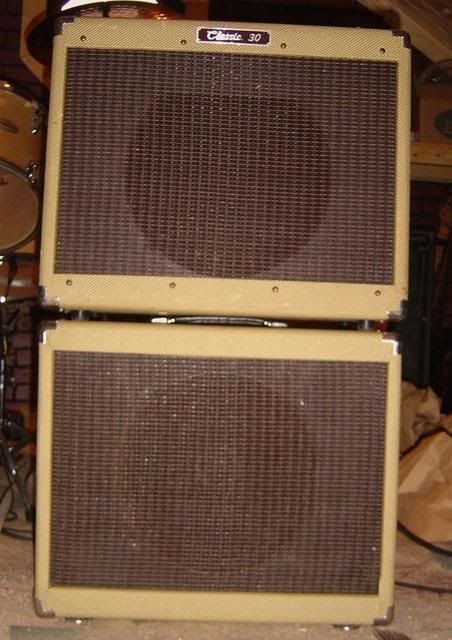
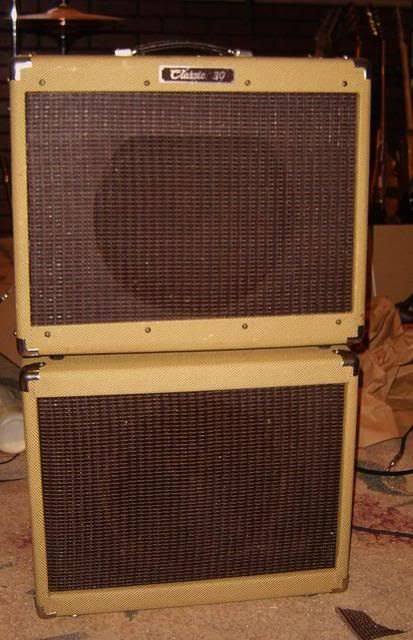
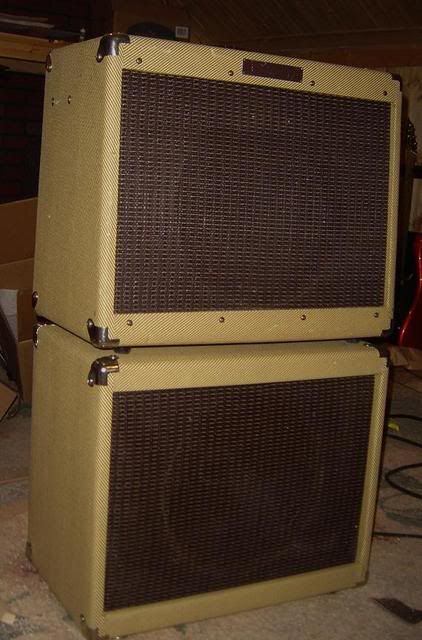
It's starting to become a tradition for me to build a cabinet of some type around Thanksgiving. Since I'm at my parents' house on Thanksgiving anyway, for two years in a row now I've taken some wood with me and used my dad's table saw to make some finger joints for cabinets. Last year it was a head cabinet, this year it's a pair of 112 speaker cabinets. I'm doing two only because the tweed and grill cloth come in wide sections, so I'll have to order enough to cover two cabinets. I figured building two was not much more work than building one, so I'm building two in the hopes of selling one at or near cost in order to cut my losses. I'm going to use this cab with my Classic 30. They are going to be solid pine with 3/4" birch ply speaker baffles and a 1/4" birch ply rear baffle. They'll be closed back cabs and will be covered in tweed with a brown grill cloth. I'm getting the tweed and grill cloth from Peavey, so they should match the Classic 30 perfectly (other than the fact that my C30 is a little road worn already).
Anyway, I didn't take pics of the finger joint cutting process, but I've got pics of that process from my last build, so I can re-post those if you want to see.
Last night when I got home, I glued up one of the cabs and let it dry overnight. This morning I glued on the runners for the speaker baffle and glued and clamped up the second cabinet.
So, here are the pics of what I have so far:
The cut wood:

The cabinet glued and clamped:

What the corners look like with the fingerjoints:

And the runners for the speaker baffle:

That's all for now. This evening after work, I'll probably get the runners for the rear panel glued in, and the runners for the speaker baffle on the second cab glued on. I've got a party to go to tonight though, so I probably won't get the hole cut for the speaker until tomorrow.
Total cost for the wood for both cabs: $41. Time spent so far: about an hour or so.
It's starting to become a tradition for me to build a cabinet of some type around Thanksgiving. Since I'm at my parents' house on Thanksgiving anyway, for two years in a row now I've taken some wood with me and used my dad's table saw to make some finger joints for cabinets. Last year it was a head cabinet, this year it's a pair of 112 speaker cabinets. I'm doing two only because the tweed and grill cloth come in wide sections, so I'll have to order enough to cover two cabinets. I figured building two was not much more work than building one, so I'm building two in the hopes of selling one at or near cost in order to cut my losses. I'm going to use this cab with my Classic 30. They are going to be solid pine with 3/4" birch ply speaker baffles and a 1/4" birch ply rear baffle. They'll be closed back cabs and will be covered in tweed with a brown grill cloth. I'm getting the tweed and grill cloth from Peavey, so they should match the Classic 30 perfectly (other than the fact that my C30 is a little road worn already).
Anyway, I didn't take pics of the finger joint cutting process, but I've got pics of that process from my last build, so I can re-post those if you want to see.
Last night when I got home, I glued up one of the cabs and let it dry overnight. This morning I glued on the runners for the speaker baffle and glued and clamped up the second cabinet.
So, here are the pics of what I have so far:
The cut wood:
The cabinet glued and clamped:
What the corners look like with the fingerjoints:
And the runners for the speaker baffle:
That's all for now. This evening after work, I'll probably get the runners for the rear panel glued in, and the runners for the speaker baffle on the second cab glued on. I've got a party to go to tonight though, so I probably won't get the hole cut for the speaker until tomorrow.
Total cost for the wood for both cabs: $41. Time spent so far: about an hour or so.